Showing posts with label van life. Show all posts

20 November, 2017

Misadventures with the Martys

Introducing: Misadventures with the Martys

Hello, Greetings, G’day, and Merry We Meet

I want to wish you a happy happy day, and let you know about big changes coming soon. Very soon, as in now.
For almost a year or so my wife Elissa IMG_8671  IMG_8568 

and I have been posting both videos and blog entries here on my personal blog, and I’ve enjoyed having all of the content here but I think it’s high time that we have our own channel. Elissa and I together. Each having/sharing equal parts to it. That also means a new website LINK (which I have been diligently building), new social media connections, and a new YouTube channel. After all there are two of us. 
This blog started out as a way for me to connect with booking agents, fans, potential fans, so it’s unfair to Elissa to make herself known through her husbands name. She is a person on her own, so onto the new channel.

It’s called, “Misadventures with the Martys”. LINK

Now, let me introduce you to what you will be seeing on that new….ah....well everything channel.
The same sort of programming you’ve been enjoying from the both of us here. We’ll be doing travel shows and adventures, household projects, how to’s, goofing off, and lots of laughing.

This channel won’t be getting abandoned at all. I will continue to publish here as well; however, it may not be as much and it will probably be a lot more music oriented. Which means, gig stories, how to’s, song crafting, set list crafting, booking gigs, recording and all that.

We really hope that you’ll come by our other website which will be the sort of jumping off point for all things ‘Marty’.  Misadventures with the Marty’s is an eclectic blog/vlog published every Wednesday. Some of the things we have coming up are: 
  • trying out our new tiny house on wheels, 
  • traveling to the desert for two weeks in January, 
  • booking gigs along the way, 
  • how to’s and remodels,
  • maybe some reviews, 
  • and fun day to day adventures. 
There will be both a blog and a video to accompany each other.
This channel (the one you’re on now) will be going back to an every two week publishing schedule.

Please stop by the new place comment, subscribe, and share with your friends.
Keep the shiny side up.

Trevor & Elissa

18 September, 2017

Interview and Van Tour

Our friends Jack & Kitty have a youtube channel and they put our van in it.

Who are Jack and Kitty?

I’ve known Jack and Kitty for many years and watched their careers as entertainers grow. They’re happy, joyous, lovely, folks and it reflects in their music and antics on stage.
They are musicians, writers, directors, filmmakers. They did a kids show for PBS which won them an Emmy. Yup, they won an Emmy.  

Their Youtube channel is a mix mash of all things happy, vaudeville, musical, and they decided to do a little video tour of our van/tiny house thingy.

We can’t thank them enough for popping by and taking a little tour of ‘Woody’, and really encourage you to stop by their channel, like, and subscribe.
Oh and while you’re there pop by our channel and do the same.

Here is their video. 

I really like their channel. Hey the light you see me using in my van in the video is terrific. We got ours on Amazon. Here's a link.
Keep the shiny side up.
---Trevor & Elissa


11 September, 2017

Great River Bluffs State Park

Great River Bluffs Minnesota State Park


It’s located at the top of sandstone bluffs overlooking the great Mississippi river and our neighbors to the east Wisconsin. This park is filled with life and amazing overlooks. Bring your binoculars and cameras because if you don’t you’ll kick yourself.
While we didn’t camp out here we did walk through the campground and it’s pretty great.
When you enter the park you go through butterfly and meadow land and pull up to a smallish parking lot. (It’s just the first there are more further on down the hill.)
The paths are well kept and bring you through several twists and turns and (at least the one we were on) brought us to this giant vista. It overlooked the Mississippi river and the south-western bluff side of Wisconsin.
It was amazing.
Tons of bird life. Being on the Mississippi I wouldn’t doubt that it’s on the migration route of a lot of different bird species.
You’ll see just watch the video.
Thanks for watching and stopping by.

Keep the shiny side up.

Trevor & Elissa 


28 August, 2017

Perrot State Park

     On the fourth day of our journey we ended up at Perrot State Park in Wisconsin. A cute little town named Trempealeau is very near the park. Both are worth visiting.
The park is cradled by the banks of the Mississippi river  on one side and bluffs of Southwestern Wisconsin on the other. Wildlife abounds here. You will find everything from meadow lands with its butterflies, varied plant species and flowers to deep forest with a great variety of different species and ages of tree’s. The trails walk you through any of these places at any level of hiking you will want or need. There is also a wildlife refuge area very near the park and both are excellent for canoeing or kayaking, but I don’t believe you can fish in the refuge.

     Some of the towns near the park are Trempealeau (as I’ve mentioned), Centerville, Galesville, and Winona is on the Minnesota side but only a drive of maybe 20 minutes if you drive slow. Galesville is a cute picturesque town with a really neat greasy spoon named, ‘The Garden of Eatin’. They have guitars mounted to the almost every space of wall there is.
Centerville too is located just before Galesville and if you’re coming from the Minnesota side you have to go through it to get to Trempealeau and the park.

     I had a gig in Trempealeau, Wi the night we arrived at the park. I played at a placed called, ‘The Historic Trempealeau Hotel’. It sits at the base of a hill with the great Mississippi to look at through the windows of the restaurant or your room windows. The food at the restaurant is among the best you’re going to find in all of Wisconsin. They locally source their organic dishes do veggie, vegan, or not if that’s your preference.  The hotel is listed as a haunted hotel, but I haven’t ever experienced anything like that. It is a period hotel in that you share two bathrooms with the rest of the floor. However don’t let that stop you from experience this place. It’s a wonderfully comfortable environment with great people, food, music, drinks, and a solid nights rest.

     The next morning we awoke to bird songs and sunshine. We had all day to hike around before moving on to the next adventure. We hiked along the bluffs and meadows and took a lot of video’s. Have a look at the video to see just where we went.

Wishing you all the best.

Trevor and Elissa


14 August, 2017

Gooseberry Falls

Hello-

Today's entry is a short video about our journey to the famous Gooseberry Falls in way northern Minnesota.  We were so excited to be there that we forgot to take video shots, so this video is a smallish (under three minute) montage of our photo's.
We hope you like it.

Keep the shiny side up.
Trevor & Elissa Marty


17 July, 2017

Watch out! He's got a torch!!!

Okay so it's just a joke; although, I do have a torch and I use it in this video.

There are several thing that I have never done and while doing this project have had to learn how to do them. Several meaning lots. For instance. I had to remove a rear heating and a/c unit from the van, I had to insulate it, put paneling up, drill holes through my precious (the van), and by no means the last of the challenges....making battery cables.
Now, having never done this before I did what any sensible person would do....I went to Youtube. After watching a few 'blowhards' I decided I can do it to.  Heck if they can do it so can I.
Spoiler alert Spoiler Alert!
I did do it, and everything is fine, but just like a Greek or Roman tragedy that you already know the ending to. It's the telling of the tale that matters.
Pull up your chairs, refresh your coffee and hit play.
Don't forget....he's got a Torch!!!!

Keep the shiny side up.

03 July, 2017

Electrical Test Run

Electrical Test Run.

It’s just like it sounds. Elissa and I go for a test ride of the electricity.
I set it up so that the control panel is in the front of the bed and we have easy access to it. The battery however is going to be mounted in the rear of the vehicle. A wire will bring the current up to the control panel. This is just a test run to see if I wired, soldered, and fused everything properly. It turns out I did. Hip Hip Hurray. This has been quite a steep learning curve. There was one minor-ish issue. I had hoped to have wired an on/off switch to the charging station. The reason for this is because I choose (accidentally I might add) a back-lit kind and the light is always on. There is no way to turn it off, so I thought if I put an on/off switch before the current it would turn the thing on and off. I did it wrong and it was always on.
****Author Shrugs his shoulders****
You'll see what I mean in the video and I’ll keep at it and get it figured out at some point.  
Well, thanks for stopping by, and be sure to keep coming back for updates on the van and other miscellany.

Have a great day gang and keep the shiny side up.
Trevor Marty

PS Next week we unfurl the bed and take it for a test run. Watch out for the mosquito's.

19 June, 2017

Van Build Electrical System

Components that I will be using for my van build electrical system.

     Today we're going to go through the parts which I will be using for the electrical system on my camper van. Now, this isn't a 'how to' blog. Nope, it's only a small outline of what I will be using for my own build.

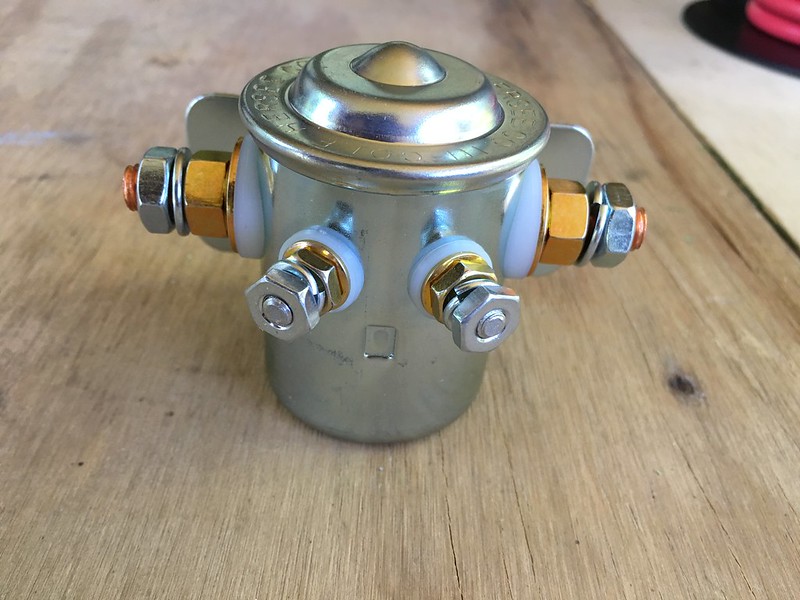
     We’re going to start with the way I will be charging my battery, because that’s the front of the van and it seems like a terrific place to begin. I have decided to charge my battery bank (all one battery of it) two ways. One is through the alternator and the other is via solar power. Now as of the writing of this blog post I don’t have any solar so we will just be doing the alternator for the time being. The alternator charges the starting battery, the one which starts your vehicle. It is possible to split that charge and allow it (the alternator) to charge a second battery. This is what we will be doing. There are many ways to do this, but I am choosing to use a constant duty solenoid. IMG_8225
It is an electromagnetic switch which is turned on via a ‘keyed fuse thing’. Essentially you connect it to the starting battery and the house battery then connect it to the main fuse box. Making sure that the fuse you’re using only turns on when the key turns the car on. That way the two batteries are not connected when the car is off. They are only connected when the car is on.
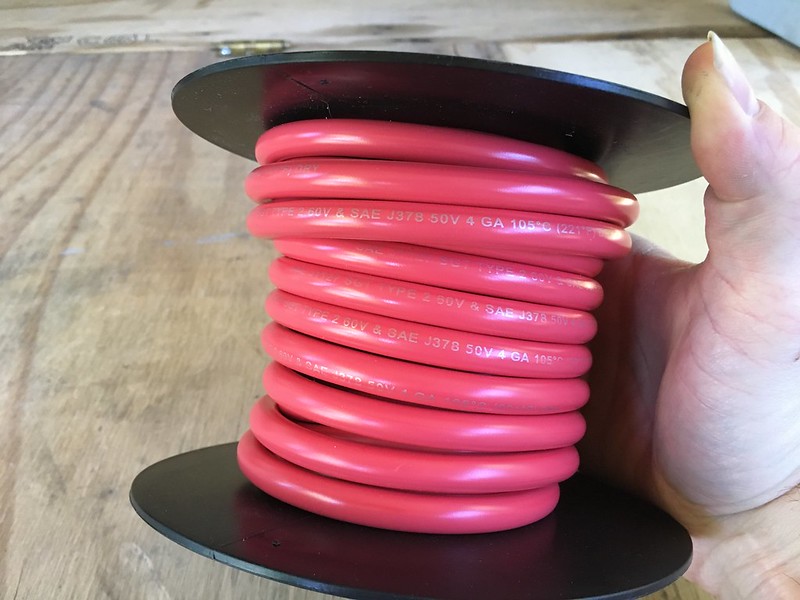
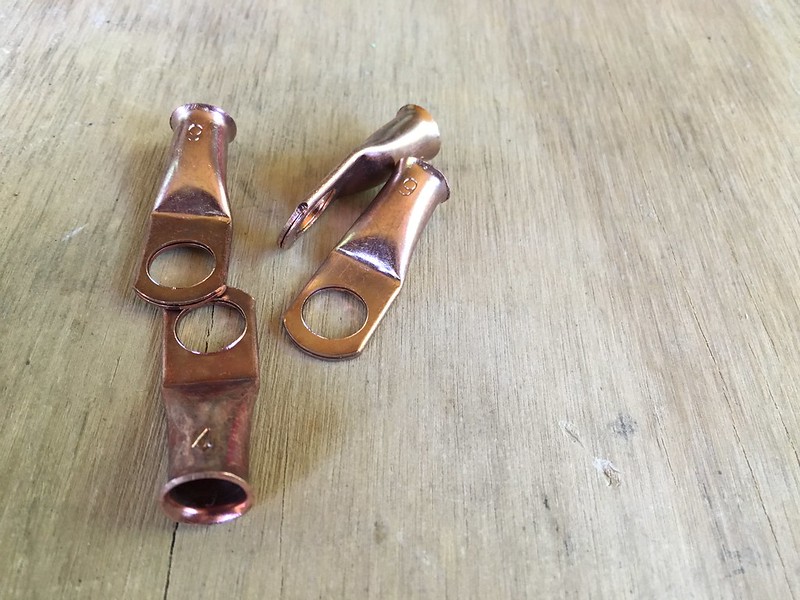
The wire you use to connect the two batteries is huge. Mine is 2 gauge wire as you see in the photo.  IMG_8224These are the connectors which will be squished onto the ends of the wire.  
IMG_8227
You’re also going to need a really big fuse for that part. This fuse will go under the hood, but as of the this moment I’m not entirely sure where. I think it goes after the solenoid and before the house battery. .
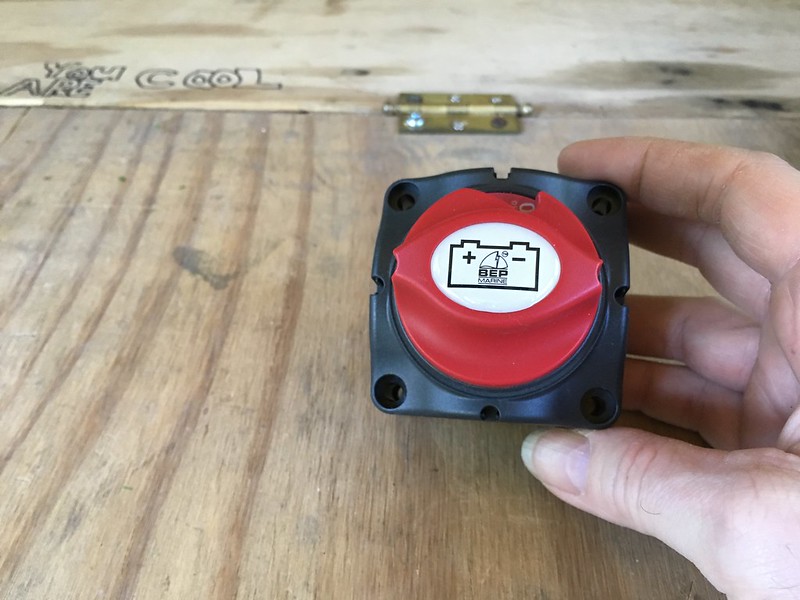
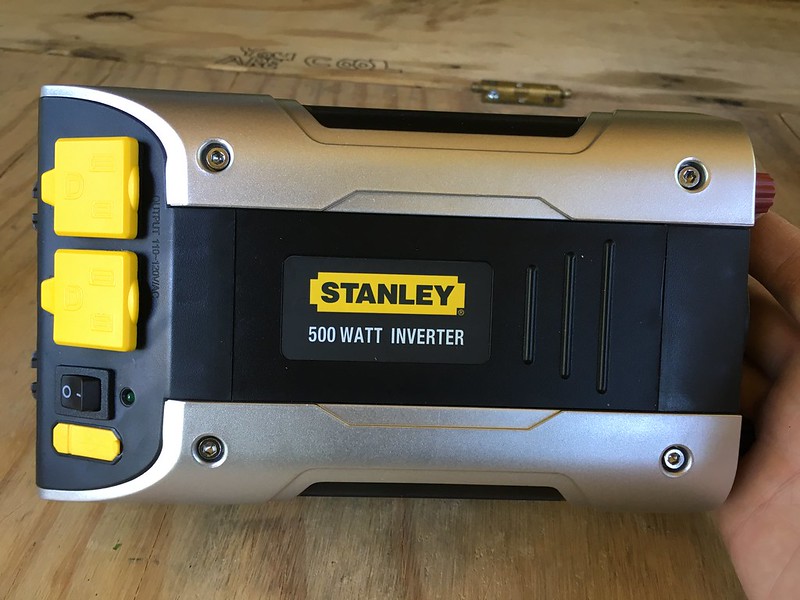
I’m choose to put a nice giant red on/off switch to the whole system. Here is my switch. It sure is a fancy red color isn’t it? IMG_8232 Now we will put another one of those giant fuses. See previous photo somewhere back there. That leads to a 500 watt inverter. 
IMG_8238
Now many boondockers will be using way way bigger ones, but we are not full time and will not be bringing fridges and things. It’s going to be there as sort of a just in case. I mean the minute you don’t think you need something is the minute you need it, so here it is. .
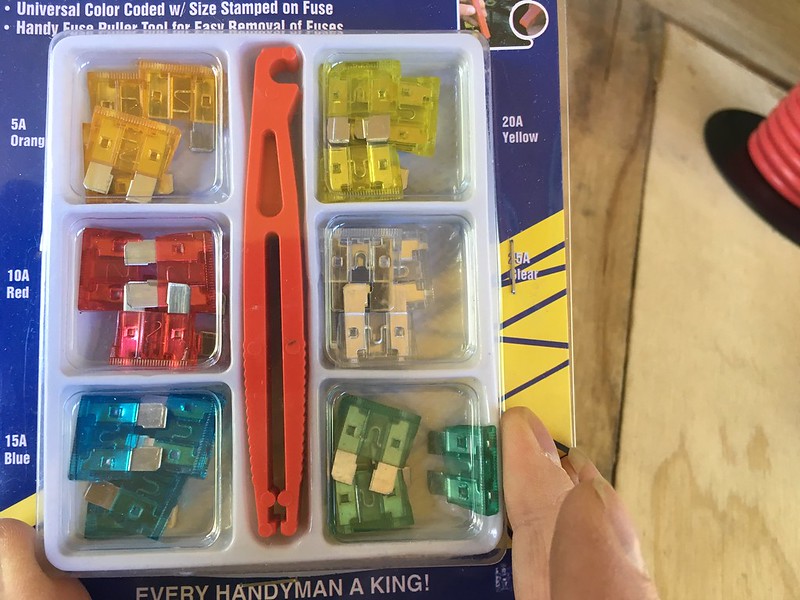
Here is the little dc fuse box, and fuses I will be using for the LED lights and the charging stations. IMG_8226
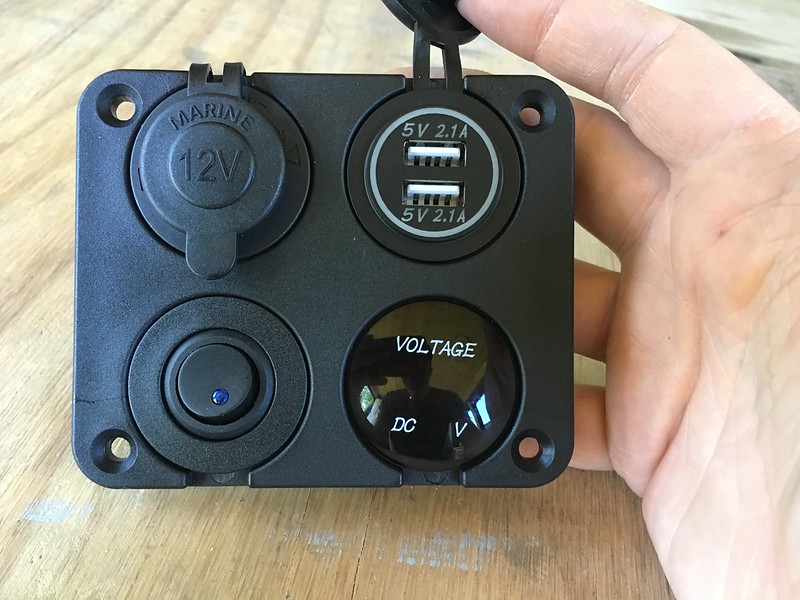
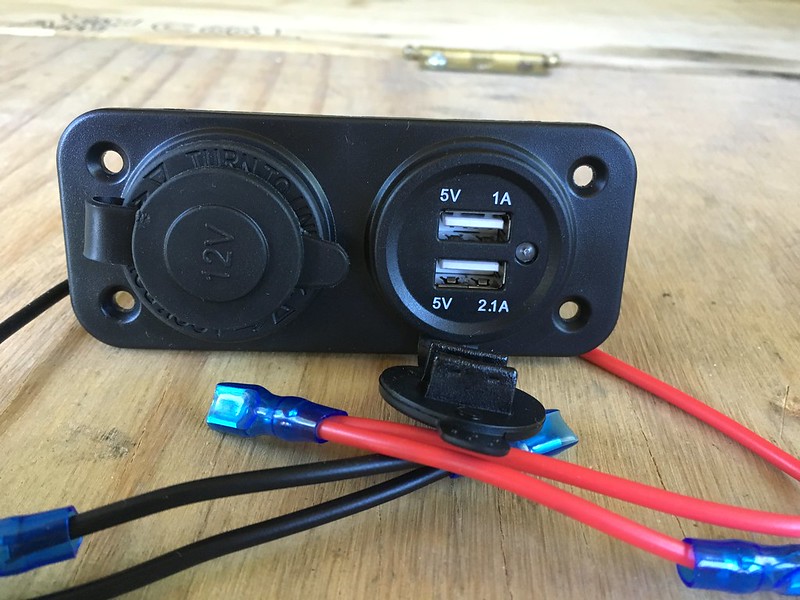
Here are the charging stations and a switch for the smaller of the two. IMG_8237 IMG_8236
I’m going to wire the switch in because I noticed when I tried it before that the little blue light stays on all the time. I don’t like that. I want to be able to switch it off when it's not in use. IMG_8228
That’s it really. We have a small system because we don’t have many needs really. We are not full timers. We will be doing this part time till we retire and then we’ll see what happens. For the moment this will do.
Oh and here is the last piece to our electric puzzle although it’s not really electric. It’s just fun. IMG_8239
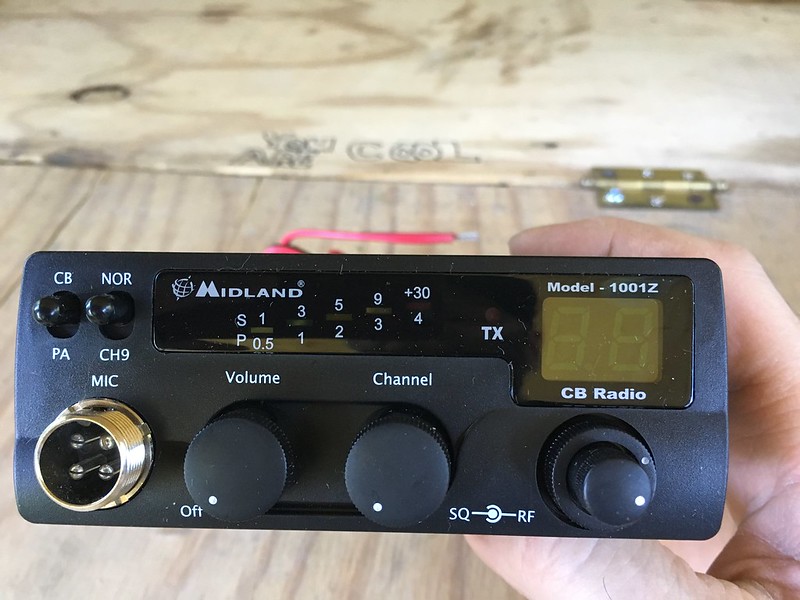
A CB.
Yup, because well….why not.

Have a great day gang and keep the shiny side up.

30 May, 2017

A Realistic Bed Build

 
     Well, I guess I’m a day late and a dollar short, but here it is anyway...Monday’s blog on Tuesday.
You see I wanted to include the bed build into Mondays blog because it’s finished.
Well sort of.  The ‘sort of’ only means there is always something more you can do to it.
I’m sure if we wanted we could have sanded the boards, stained them, or both. We could have measured better, and probably not scuffed the walls up while we installed the silly things.
However, we didn’t do those things what we did do though was this.
Build the legs and support parts, then measured a few times, scratched our heads, made more coffee, and finally cut the one piece of ¾ inch plywood we had. I have actually had that piece around for probably close to 10 years. It’s held a motorcycle, leaned against the door, been set between two saw horses with a sheet for a table cloth and a bunch of good food on it for my wedding rehearsal dinner, and probably more that I can’t remember. Now it’s going to be a bed for my wife and I as we begin another chapter in our lives and travel the country.
      It took quite a while to settle on the design we did because there are just so many good ones out there. Just when we thought we had decided we’d be astounded by someone elses design. What finally made us decide what we wanted was a realistic look at my own abilities. Don’t get me wrong I’m not downing myself at all, but a construction guy I am not. It’s only recently that I’ve been able to tell the difference between my thumb and the head of a nail. 
     I think to set oneself up for success you have to have a realistic view of your starting point or you’re just going to get disappointed. Doing this project has helped me to actually get some ‘street cred’ and walk into Menards or Home Depot head held high shouting to the world “I know what a hammer is.” as I strut down the long aisles.    
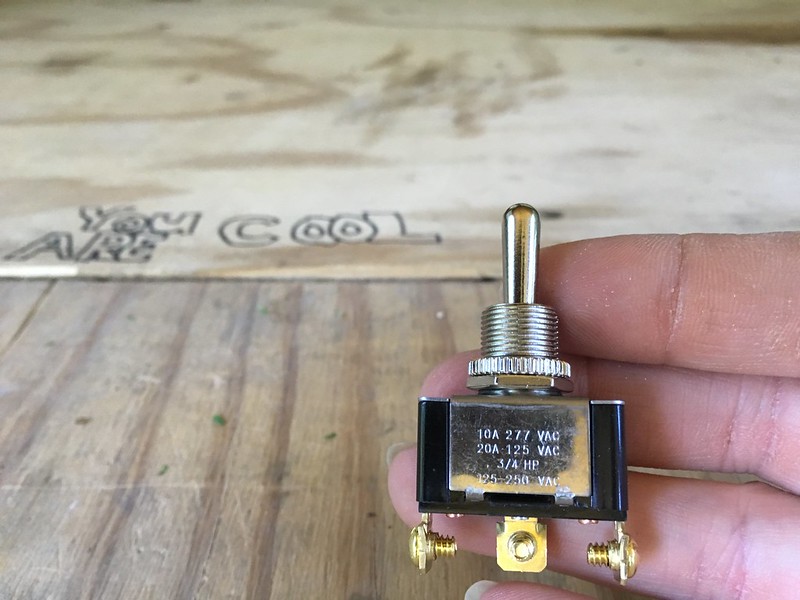
     The hinges in the middle of the bed were given to me by an 95 year old WWII veteran who lives two houses down from us. His gutters needed cleaning and he couldn’t get up that high on the ladder, so I did that and he gave me four hinges and an on/off switch which will also be used in this build.  I’ve tried to include photo’s in the blog because I know not everyone has the data plan to watch the video, however there is also a video.

Thanks for tuning in and having a look here.
Next week we’re going to have a look at the components I’m going to use on the electrical install.
Until then see ya
    Trevor Marty
PS The video is under the photo's.
This is how the legs look.

Under the bed.
I just used what screws I had around.


It's true. You are cool. Thanks for reading this.

My baldness laying in the bed.

Two different colored socks and a bird feeder.


Great Storage!

01 May, 2017

A week, A van, & a dream

     Today we’re going to talk about my vacation. I got a week off and it was beautiful. Now in April in Minnesota you can get anything as a matter of fact as I write this it’s the last day of April in 2017 and there is a Winter storm watch for Northern and Central Minnesota. Nothing like that happened on my days off though. It was a beautiful time and I got a lot of stuff done.
I put a sub-floor in, a laminate floor on top of that, painted and finished the walls, and built a counter top which I sunk my homemade sink into. There’s a blog about that sink here. All of this got done in a week.
     Before you tell yourself that I must have all of this experience doing this sort of thing let me assure you that I don’t. I don’t know my ass from my elbow when it comes to construction and constructing things. I did however make it a goal to learn as much as I could about it while doing fun stuff in life. Hence the van. The sub-floor that I built, and I’m sure that I did it wrong, was made with plywood cut to the shape (more or less) that the floor of the van was in. I did put this sticky stuff that I bought at Lowe's which I forget the name of. It’s suppose to keep heat out and take the noise down. It was a lot cheaper then that name brand stuff.
Now I saw pictures of people doing floors like this and they had this special tape they put on the boards to make the pieces hold together better. Eh, I used duct tape.
                             ****shrugs shoulders and makes a funny face****
I don’t know if it’ll work. I just did it. Afterword I got to thinking. I probably should have made sure that the floor was level which is something to remember for next time. 
     Then I started putting the laminate flooring in. Now everyone will tell you it’s super easy. They’re lying; however, having said that I will also say I’ve done harder things. Think post hole digging in August then think a lot of post hole digging in August and you’ll be on the right track.
Okay the laminate wasn’t super hard, but it had challenging parts. I think if someone does it a few times they will get it quickly or if someone has a nice square area to put it in you’ll be fine. A Chevy Express 1500 is known as a curvy lady. She is not square anywhere.
     Elissa, and I also finished with insulating, priming, and painting the walls as well. We found the primer and the paint in the basement. We used them when we painted the house a couple of years ago. We have the same green on our windows and edging. 
     The counter-top was relatively easy. It had it’s tough moments, and I’m sure would have been screwed up without the help of my neighbor who asked me if I was going to be using a guide when I sawed the board. I had no idea what that was so he showed me. Then he changed the blade on the circular saw I got at a pawn shop. Imagine my surprise when I realized that cutting the wood could be easy and not have burn marks with the new blade.
I built the legs for the counter from what I figured they needed to be to hold the top, and I was right. I got the shape, the support, the size everything right.
     Next came the hard part. I had to drill the holes which would become the cut out for the sink. I measured like three or four times. This wood was my baby. I had sanded it, and preened it with mineral oil I didn’t want it screwed up with one miss measured hole.  Eventually I got it drilled, and cut out but I had to keep cutting and slowly widen the hole for the sink. I did it slow and took my time so that it would work well. Elissa was right there helping with her eye’s as well. As you will see in the video it turned out terrific.

Now the next steps are to start building the bed and begin putting the ceiling together. Keep tuning in to see how this goes.

Thanks
Trevor


20 March, 2017

Update on the van

How about an update on the van to rv project?

This is a smallish one and it’s all about making a butcher-block counter top.
We went to Lowes and got a nice piece of Aspen and then I put food grade Butcher Block oil on it. In the video you will see that I have six layers of it on the wood. It’s a very pretty wood and with the oil on it I think you’ll agree it’s brilliant.

Have a great day.