Showing posts with label chevy express. Show all posts

02 October, 2017

Van Build: Home Made Solar Mounts

Greetings and Salutations People of Earth

Okay, okay I admit it. I’ve been watching way to much Sci-fi on Youtube. You know that place is a crazy little rabbit hole. Once you go down it’s really hard to get out again.
Today’s blog is all about putting the finishing touches on the solar system.
Specifically the mounting of the panels on the roof of our van.

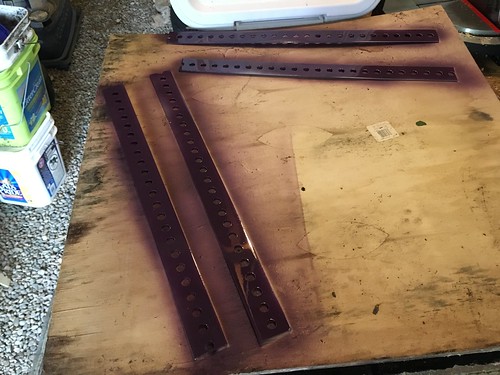
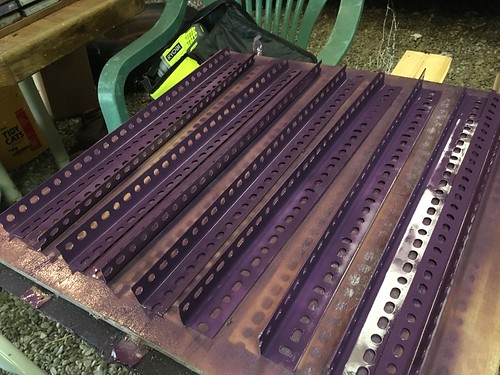
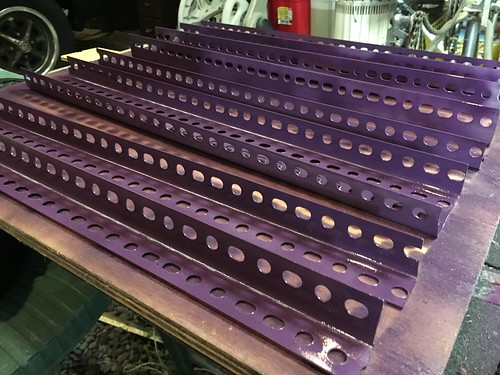
Initially I was going to just buy a mounting kit, but when I saw the price and what it was I figured I could do just as well. I went to the hardware store and got a bunch of screws, some angle iron, and a couple of other things.

I cut them with a jig saw and then painted them. I used purple because
A. It was the prettiest of the spray paint I had it on hand and
B. It was the kind that stays on metal
You’ll see in the photo’s that I also cut some non angle iron pieces. Those are made specifically for putting the panels at an angle to better get the sunlight.
IMG_8482
IMG_8483
IMG_8484

The solar panels are two 100 watt ECO-WORTHY monocrystalline that I got from Amazon. (Link below) Then I got 10 feet of 10 gauge red and black solar extension wire from a place called Windy Nation also off Amazon. The heavy duty ladder carrier is from NC Deals Online and it was a bugger to drill through. It is very heavy duty steel. Links to all of these will be at the end of this entry.

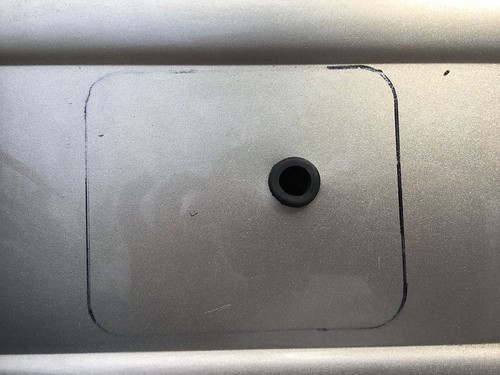
Drilling a hole in the van was tough to do because well there’s now a big hole in the van, but if you do it right you won’t get any water inside. I am not an expert, but I just wanted to do it myself. Once you drill a hole you need to put a rubber grommet in it. You can see it in the photo. It’s just this rubber thing that prevents the wires from getting cut on the sharp edges of the hole you’ve just drilled.
IMG_8570

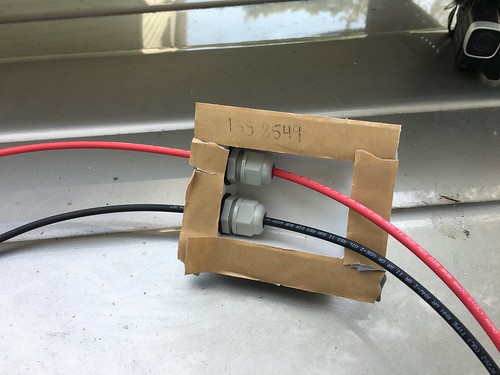
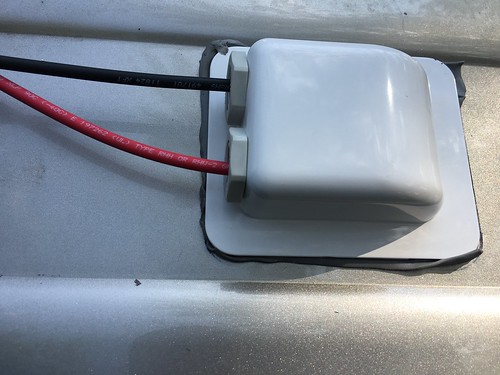
Now’s the time for this thing called a Weatherproof solar double entry gland. Say that five times quick.
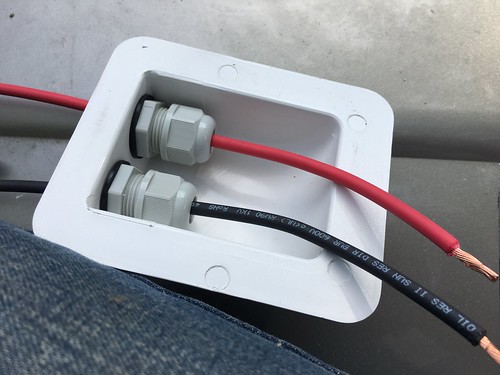
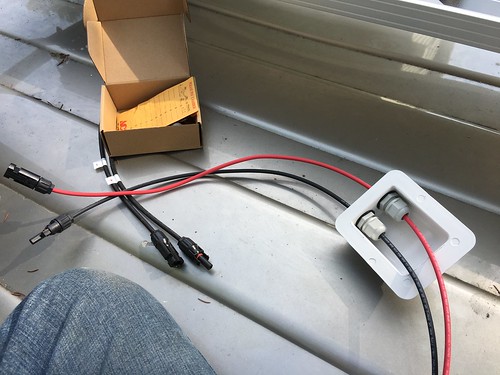
IMG_8569
 IMG_8572
IMG_8573
IMG_8574
 
 When you combine that with this putty tape, and some Dicor Self-Leveling Lap Sealant. No water’s going to get in.
You’ll be able to see the whole process in this video, or if you don’t have that kind of data package there’s always the photos. 
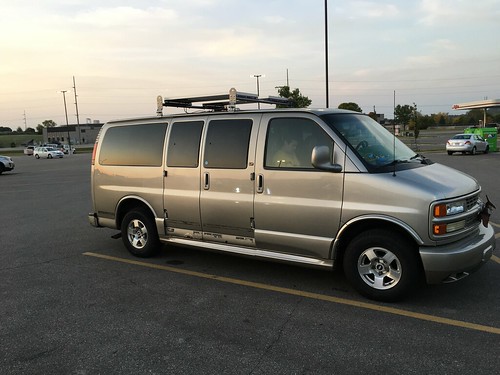
 IMG_8577


Here's this weeks video.

 
See ya next week.
Keep the shiny side up.

Trevor & Elissa

Links where you can purchase these things from Amazon.

Dicor http://amzn.to/2yCxoT4 
Ladder Rack  http://amzn.to/2xQXeFA
Solar double entry gland  http://amzn.to/2x8rdVC
10 ft red & black 10 gauge solar extension wire  http://amzn.to/2yCo6GV
Windy Nation 100 watt 12 Volt solar panels  http://amzn.to/2xLjeQl


18 September, 2017

Interview and Van Tour

Our friends Jack & Kitty have a youtube channel and they put our van in it.

Who are Jack and Kitty?

I’ve known Jack and Kitty for many years and watched their careers as entertainers grow. They’re happy, joyous, lovely, folks and it reflects in their music and antics on stage.
They are musicians, writers, directors, filmmakers. They did a kids show for PBS which won them an Emmy. Yup, they won an Emmy.  

Their Youtube channel is a mix mash of all things happy, vaudeville, musical, and they decided to do a little video tour of our van/tiny house thingy.

We can’t thank them enough for popping by and taking a little tour of ‘Woody’, and really encourage you to stop by their channel, like, and subscribe.
Oh and while you’re there pop by our channel and do the same.

Here is their video. 

I really like their channel. Hey the light you see me using in my van in the video is terrific. We got ours on Amazon. Here's a link.
Keep the shiny side up.
---Trevor & Elissa


28 August, 2017

Perrot State Park

     On the fourth day of our journey we ended up at Perrot State Park in Wisconsin. A cute little town named Trempealeau is very near the park. Both are worth visiting.
The park is cradled by the banks of the Mississippi river  on one side and bluffs of Southwestern Wisconsin on the other. Wildlife abounds here. You will find everything from meadow lands with its butterflies, varied plant species and flowers to deep forest with a great variety of different species and ages of tree’s. The trails walk you through any of these places at any level of hiking you will want or need. There is also a wildlife refuge area very near the park and both are excellent for canoeing or kayaking, but I don’t believe you can fish in the refuge.

     Some of the towns near the park are Trempealeau (as I’ve mentioned), Centerville, Galesville, and Winona is on the Minnesota side but only a drive of maybe 20 minutes if you drive slow. Galesville is a cute picturesque town with a really neat greasy spoon named, ‘The Garden of Eatin’. They have guitars mounted to the almost every space of wall there is.
Centerville too is located just before Galesville and if you’re coming from the Minnesota side you have to go through it to get to Trempealeau and the park.

     I had a gig in Trempealeau, Wi the night we arrived at the park. I played at a placed called, ‘The Historic Trempealeau Hotel’. It sits at the base of a hill with the great Mississippi to look at through the windows of the restaurant or your room windows. The food at the restaurant is among the best you’re going to find in all of Wisconsin. They locally source their organic dishes do veggie, vegan, or not if that’s your preference.  The hotel is listed as a haunted hotel, but I haven’t ever experienced anything like that. It is a period hotel in that you share two bathrooms with the rest of the floor. However don’t let that stop you from experience this place. It’s a wonderfully comfortable environment with great people, food, music, drinks, and a solid nights rest.

     The next morning we awoke to bird songs and sunshine. We had all day to hike around before moving on to the next adventure. We hiked along the bluffs and meadows and took a lot of video’s. Have a look at the video to see just where we went.

Wishing you all the best.

Trevor and Elissa


19 June, 2017

Van Build Electrical System

Components that I will be using for my van build electrical system.

     Today we're going to go through the parts which I will be using for the electrical system on my camper van. Now, this isn't a 'how to' blog. Nope, it's only a small outline of what I will be using for my own build.

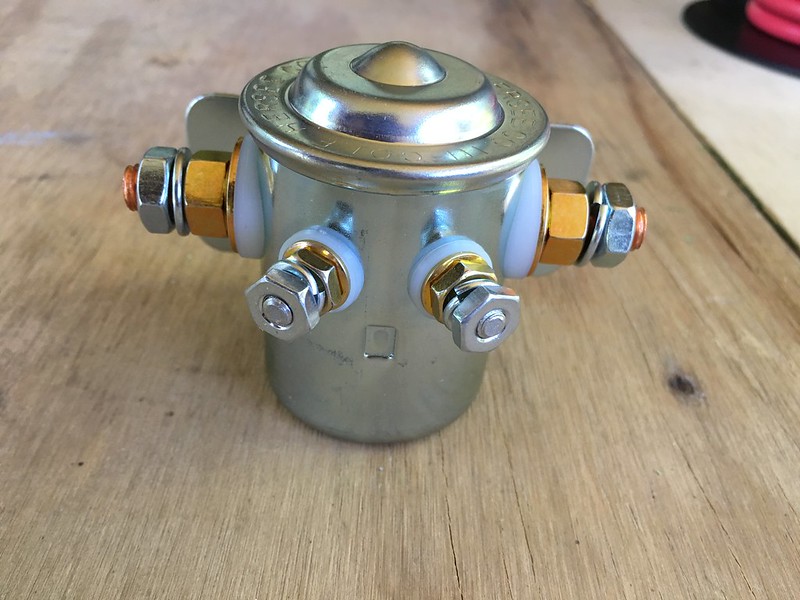
     We’re going to start with the way I will be charging my battery, because that’s the front of the van and it seems like a terrific place to begin. I have decided to charge my battery bank (all one battery of it) two ways. One is through the alternator and the other is via solar power. Now as of the writing of this blog post I don’t have any solar so we will just be doing the alternator for the time being. The alternator charges the starting battery, the one which starts your vehicle. It is possible to split that charge and allow it (the alternator) to charge a second battery. This is what we will be doing. There are many ways to do this, but I am choosing to use a constant duty solenoid. IMG_8225
It is an electromagnetic switch which is turned on via a ‘keyed fuse thing’. Essentially you connect it to the starting battery and the house battery then connect it to the main fuse box. Making sure that the fuse you’re using only turns on when the key turns the car on. That way the two batteries are not connected when the car is off. They are only connected when the car is on.
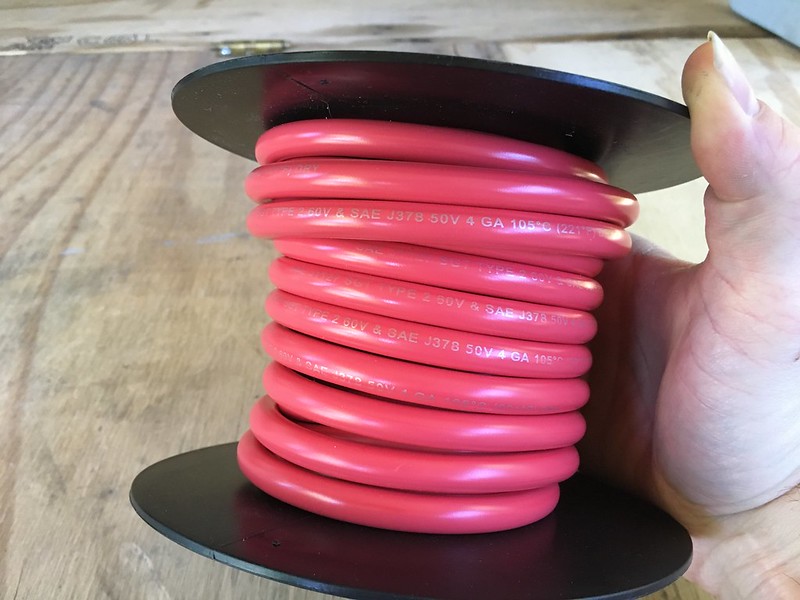
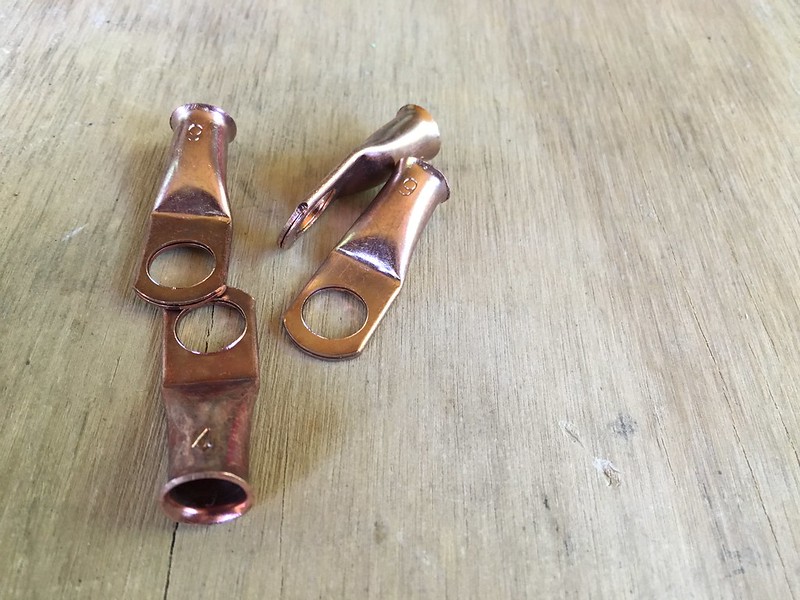
The wire you use to connect the two batteries is huge. Mine is 2 gauge wire as you see in the photo.  IMG_8224These are the connectors which will be squished onto the ends of the wire.  
IMG_8227
You’re also going to need a really big fuse for that part. This fuse will go under the hood, but as of the this moment I’m not entirely sure where. I think it goes after the solenoid and before the house battery. .
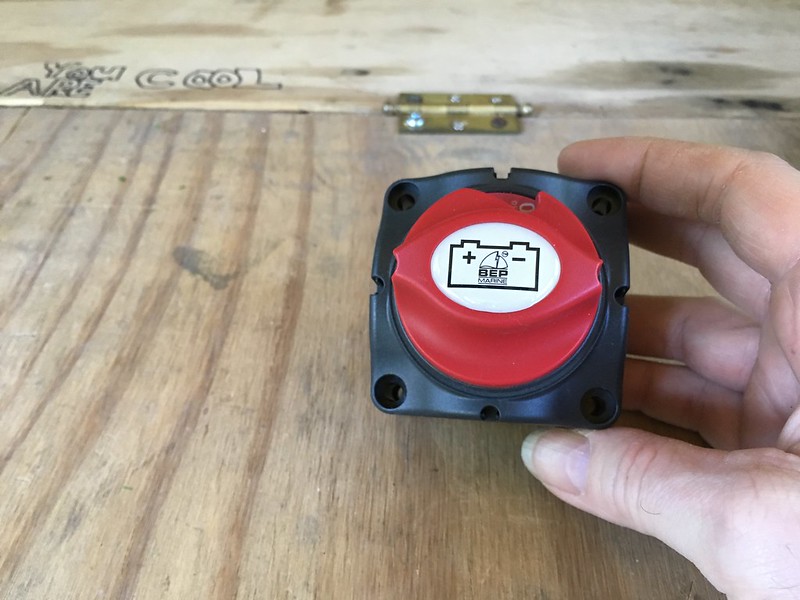
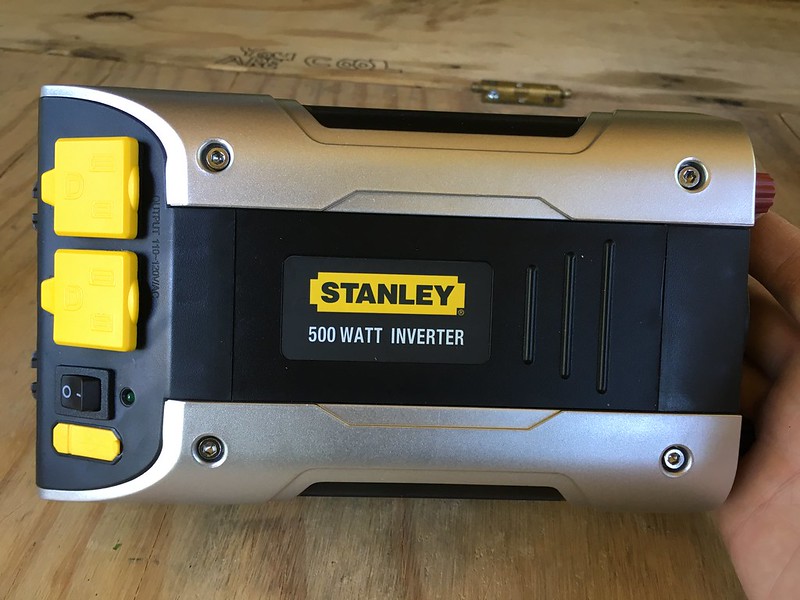
I’m choose to put a nice giant red on/off switch to the whole system. Here is my switch. It sure is a fancy red color isn’t it? IMG_8232 Now we will put another one of those giant fuses. See previous photo somewhere back there. That leads to a 500 watt inverter. 
IMG_8238
Now many boondockers will be using way way bigger ones, but we are not full time and will not be bringing fridges and things. It’s going to be there as sort of a just in case. I mean the minute you don’t think you need something is the minute you need it, so here it is. .
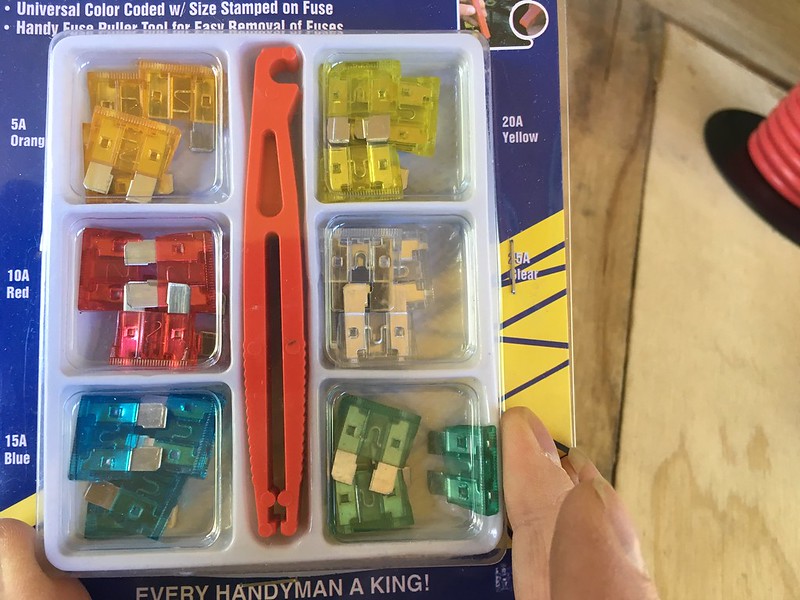
Here is the little dc fuse box, and fuses I will be using for the LED lights and the charging stations. IMG_8226
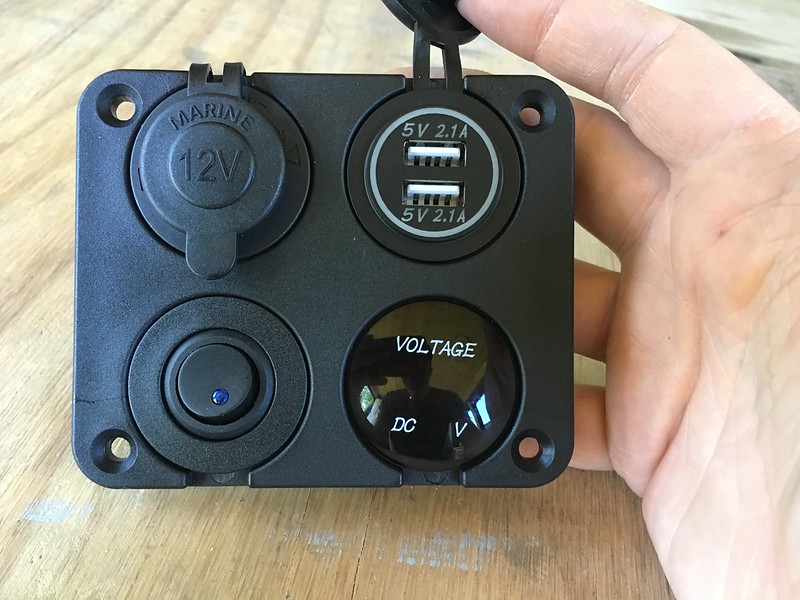
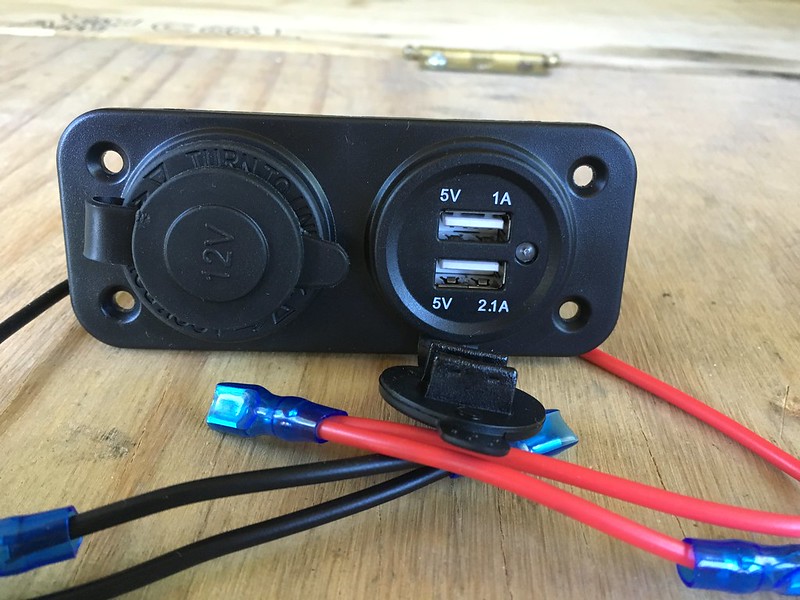
Here are the charging stations and a switch for the smaller of the two. IMG_8237 IMG_8236
I’m going to wire the switch in because I noticed when I tried it before that the little blue light stays on all the time. I don’t like that. I want to be able to switch it off when it's not in use. IMG_8228
That’s it really. We have a small system because we don’t have many needs really. We are not full timers. We will be doing this part time till we retire and then we’ll see what happens. For the moment this will do.
Oh and here is the last piece to our electric puzzle although it’s not really electric. It’s just fun. IMG_8239
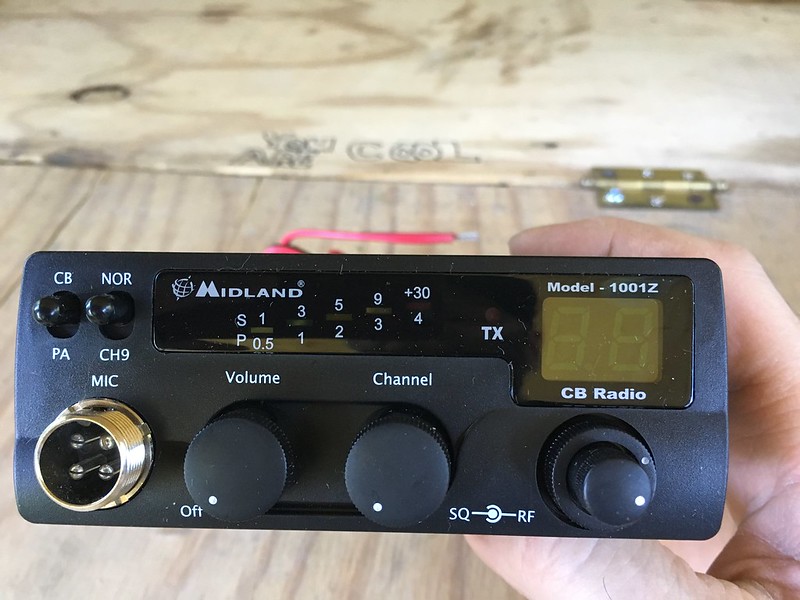
A CB.
Yup, because well….why not.

Have a great day gang and keep the shiny side up.

30 May, 2017

A Realistic Bed Build

 
     Well, I guess I’m a day late and a dollar short, but here it is anyway...Monday’s blog on Tuesday.
You see I wanted to include the bed build into Mondays blog because it’s finished.
Well sort of.  The ‘sort of’ only means there is always something more you can do to it.
I’m sure if we wanted we could have sanded the boards, stained them, or both. We could have measured better, and probably not scuffed the walls up while we installed the silly things.
However, we didn’t do those things what we did do though was this.
Build the legs and support parts, then measured a few times, scratched our heads, made more coffee, and finally cut the one piece of ¾ inch plywood we had. I have actually had that piece around for probably close to 10 years. It’s held a motorcycle, leaned against the door, been set between two saw horses with a sheet for a table cloth and a bunch of good food on it for my wedding rehearsal dinner, and probably more that I can’t remember. Now it’s going to be a bed for my wife and I as we begin another chapter in our lives and travel the country.
      It took quite a while to settle on the design we did because there are just so many good ones out there. Just when we thought we had decided we’d be astounded by someone elses design. What finally made us decide what we wanted was a realistic look at my own abilities. Don’t get me wrong I’m not downing myself at all, but a construction guy I am not. It’s only recently that I’ve been able to tell the difference between my thumb and the head of a nail. 
     I think to set oneself up for success you have to have a realistic view of your starting point or you’re just going to get disappointed. Doing this project has helped me to actually get some ‘street cred’ and walk into Menards or Home Depot head held high shouting to the world “I know what a hammer is.” as I strut down the long aisles.    
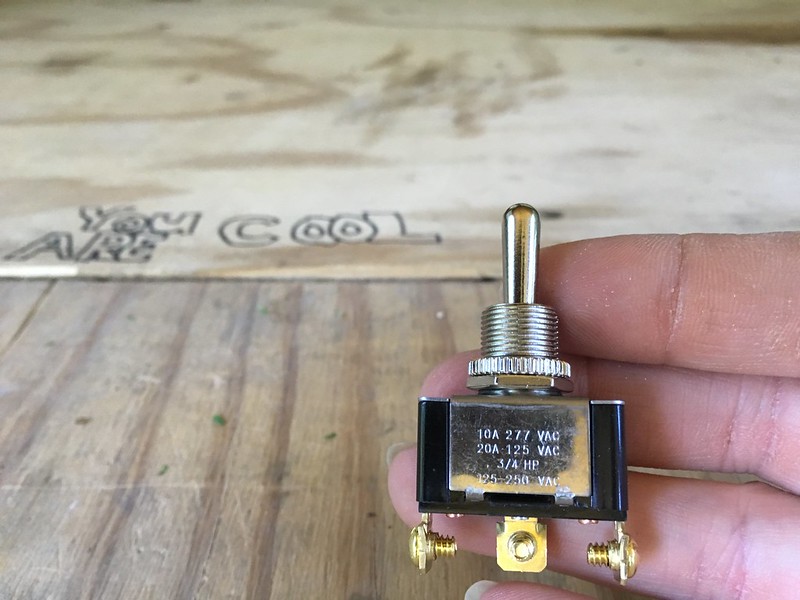
     The hinges in the middle of the bed were given to me by an 95 year old WWII veteran who lives two houses down from us. His gutters needed cleaning and he couldn’t get up that high on the ladder, so I did that and he gave me four hinges and an on/off switch which will also be used in this build.  I’ve tried to include photo’s in the blog because I know not everyone has the data plan to watch the video, however there is also a video.

Thanks for tuning in and having a look here.
Next week we’re going to have a look at the components I’m going to use on the electrical install.
Until then see ya
    Trevor Marty
PS The video is under the photo's.
This is how the legs look.

Under the bed.
I just used what screws I had around.


It's true. You are cool. Thanks for reading this.

My baldness laying in the bed.

Two different colored socks and a bird feeder.


Great Storage!

01 May, 2017

A week, A van, & a dream

     Today we’re going to talk about my vacation. I got a week off and it was beautiful. Now in April in Minnesota you can get anything as a matter of fact as I write this it’s the last day of April in 2017 and there is a Winter storm watch for Northern and Central Minnesota. Nothing like that happened on my days off though. It was a beautiful time and I got a lot of stuff done.
I put a sub-floor in, a laminate floor on top of that, painted and finished the walls, and built a counter top which I sunk my homemade sink into. There’s a blog about that sink here. All of this got done in a week.
     Before you tell yourself that I must have all of this experience doing this sort of thing let me assure you that I don’t. I don’t know my ass from my elbow when it comes to construction and constructing things. I did however make it a goal to learn as much as I could about it while doing fun stuff in life. Hence the van. The sub-floor that I built, and I’m sure that I did it wrong, was made with plywood cut to the shape (more or less) that the floor of the van was in. I did put this sticky stuff that I bought at Lowe's which I forget the name of. It’s suppose to keep heat out and take the noise down. It was a lot cheaper then that name brand stuff.
Now I saw pictures of people doing floors like this and they had this special tape they put on the boards to make the pieces hold together better. Eh, I used duct tape.
                             ****shrugs shoulders and makes a funny face****
I don’t know if it’ll work. I just did it. Afterword I got to thinking. I probably should have made sure that the floor was level which is something to remember for next time. 
     Then I started putting the laminate flooring in. Now everyone will tell you it’s super easy. They’re lying; however, having said that I will also say I’ve done harder things. Think post hole digging in August then think a lot of post hole digging in August and you’ll be on the right track.
Okay the laminate wasn’t super hard, but it had challenging parts. I think if someone does it a few times they will get it quickly or if someone has a nice square area to put it in you’ll be fine. A Chevy Express 1500 is known as a curvy lady. She is not square anywhere.
     Elissa, and I also finished with insulating, priming, and painting the walls as well. We found the primer and the paint in the basement. We used them when we painted the house a couple of years ago. We have the same green on our windows and edging. 
     The counter-top was relatively easy. It had it’s tough moments, and I’m sure would have been screwed up without the help of my neighbor who asked me if I was going to be using a guide when I sawed the board. I had no idea what that was so he showed me. Then he changed the blade on the circular saw I got at a pawn shop. Imagine my surprise when I realized that cutting the wood could be easy and not have burn marks with the new blade.
I built the legs for the counter from what I figured they needed to be to hold the top, and I was right. I got the shape, the support, the size everything right.
     Next came the hard part. I had to drill the holes which would become the cut out for the sink. I measured like three or four times. This wood was my baby. I had sanded it, and preened it with mineral oil I didn’t want it screwed up with one miss measured hole.  Eventually I got it drilled, and cut out but I had to keep cutting and slowly widen the hole for the sink. I did it slow and took my time so that it would work well. Elissa was right there helping with her eye’s as well. As you will see in the video it turned out terrific.

Now the next steps are to start building the bed and begin putting the ceiling together. Keep tuning in to see how this goes.

Thanks
Trevor


13 March, 2017

Van to RV Plans

     With Summer not to far off it’s a good time to start planning where and what you’re going to be doing. My wife and I will probably be camping a lot this year which brings up my van to rv conversion project. I live in Minnesota and the van is much to large to get into my garage so any work that I’ve been doing has been outside and in the snow. Yes, you’re right that does mean that it’s been going slower than usual even for me. If we go back in time to my other entries you’ll notice over and over one common denominator. I have very little experience with construction. Which means that this whole project is a big challenge for me and something I am very excited to learn about.
Today, let’s talk about the counter top, flooring, and the water situation.

Countertop, sink, and the junk that holds it all in place.
    
    We’ve decided on the counter top and the type of wood it’s going to be. We’ve also decided on the height, length, and depth of it as well. The counter top is going to be Aspen with a butcher block oil all over it to protect it. The height will be between 33 and 43 inches, the length around 5 feet, and the width/depth (I get those confused all the time) about 18 inches.
Counter top
 Aspen, as you can see in the picture is a light wood and sort of reminds me of Pine a little bit. The height was completely dictated by the window it’s going to be sitting in front of, the length will be five feet because that’s all the space we've got on that side of the van.
    “What’s going to hold it up”, you ask? Well, that’s the part I’m excited about. If all goes well it’s going to be a light skeleton frame tall enough to fit two or three of these plastic drawers under and strong enough to hold the counter in place. 
Storage under the sink.
      As far as an outside covering I think we’re going to use anything we can find for the sides but leave the front open. When I say open what I mean is we’re going to have some kind of draw string curtain covering. Now this is just an idea and it can change. The reason we’re leaving the front open is weight. We’re trying to keep the weight down. Weight and gas mileage don’t play well together and as it is we get between 12 - 18 miles per gallon. Imagine with all this wood.

Under the sink
The Sink
The cute drain plug
     The sink is made out of a big red plastic rectangle thing we found at Goodwill. I’ve drilled a hole large enough to put a drain in and after I get the counter top oiled up I’ll cut a space in it. Of course it’s one thing to say something like this and quite another to actually do it. When that happens I’ll be sure to get photo’s and we’ll have fun watching it.

Water

    We’re still deciding on the containers, but have decided on where and how it’s going to work. There will be two containers located right underneath the sink. One will be fresh water and the other will be gray water. That’s it. Chances are they’ll both be bungee corded in place.

Flooring

     We were looking for the perfect flooring for our little camper van thingy. That's a technical term by the way. 'Thingy'. We checked out Menards, Lowes, and any other place that we thought might sell that sort of thing. Eventually we found an open box item. It was way cheaper and although it’s not our favorite color we’re good with it. You can see it’s darker, but that’s okay with us. We did get this at Lowes, and we figure one box will cover the floor in our little van. 
      As you can see the plan is finally at a place where we can really start putting it all together. Now all we do is hope for some sunny days. When that happens I’ll be sure to take more photos.

Keep it tuned here for more updates.
Thanks for taking the time to read and hang out here. You're awesome!!


-Trevor Marty


28 November, 2016

Gutting the Van and Nanowrimo

Gutting the inside of the van and Nanowrimo.

Hello Gang-

    How are you doing today? We here at the Marty Estate are doing fine. Two thumbs up.
Today’s blog is all about the gutting of the van we’re turning into an RV. The van is a 2001 Chevy Express. They made three different types a 1500, a 2500, and a 3500 I believe ours to be the 1500 and it does have a 5.7 liter V8 engine in it. Quite the difference between that and our little four cylinder wagon.
    First though a little about Nanowrimo. It stands for National Novel Writing Month, and I have been participating in it. It’s a sort of race to see if you can get a novel written in thirty days. Now the goal is 50,000 words and I will admit that does seem like a big deal and it is, but as far as novels go that is a bit light. The type that I choose to write, an anthropomorphic murder mystery should weigh in at between 80,000 and 89,999 thousand words and that is what I’m shooting for. Having said that though I have only gotten as far as just over 32,000 words and the end of the month is only a week away. I don’t think I’ll be making it, but I still feel good about getting to 32,000 words. That’s a pretty big deal, so this weekend instead of sitting and writing all weekend I wrote a few thousand words per day and then started work on the van.
    As you’ll see in the video below there are several speakers, two T.V.’s, and a power amp thingy. The speakers are all Bose which I thought was a fun discovery, but I’ll probably take them all out. Also there is this weird air conditioner/heater thingy (don’t you love my technical parlance) in the back of the van. This two will be coming out. Besides those things the back area is gutted.
    This is exciting, because now the next step will be to sweep it out and then to start putting up the wall, ceiling, and floor. Oh and let’s not forget about the insulation and the wiring for the lights. Which means I have a lot to learn about. For example. We are planning on putting solar panels up on the the top, so we have to wire for that. Do we wait to put the finishing on the ceiling till after we put the panels up? I’m thinking, ‘yes’ because it seems easier to have that all finished before we put the ceiling on.
    There are a lot of options as far as learning to wire it and I plan on exhausting all of my options. I also plan on showing y’all every part of this transformation. Whether you’ve found this place by accident, my music, or someone pointed you doesn’t matter. What matters is that you’re here now, and I am grateful. Thank you for dropping by, and please bookmark this and check back. I post another entry every Monday, and some have video’s like this one.
Thanks again for stopping by.
I wish you good health and happiness. 

Trevor Marty
 

Trevor Marty