Showing posts with label building the van. Show all posts

02 October, 2017

Van Build: Home Made Solar Mounts

Greetings and Salutations People of Earth

Okay, okay I admit it. I’ve been watching way to much Sci-fi on Youtube. You know that place is a crazy little rabbit hole. Once you go down it’s really hard to get out again.
Today’s blog is all about putting the finishing touches on the solar system.
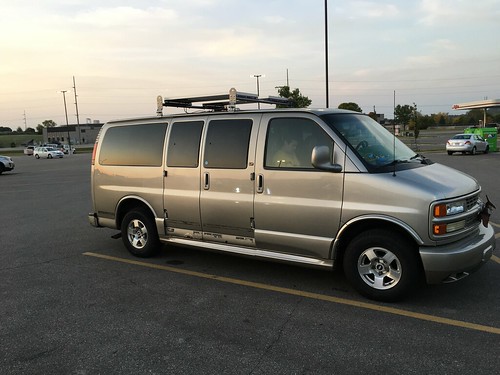
Specifically the mounting of the panels on the roof of our van.

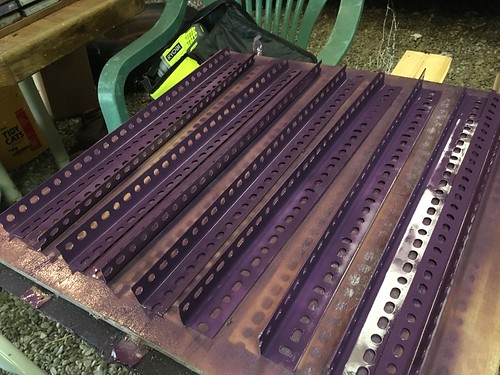
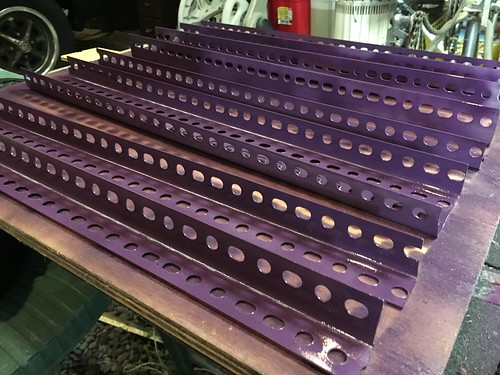
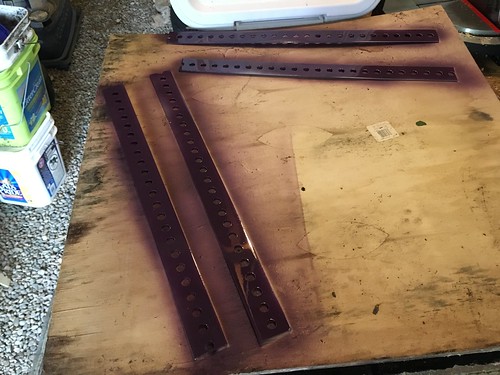
Initially I was going to just buy a mounting kit, but when I saw the price and what it was I figured I could do just as well. I went to the hardware store and got a bunch of screws, some angle iron, and a couple of other things.

I cut them with a jig saw and then painted them. I used purple because
A. It was the prettiest of the spray paint I had it on hand and
B. It was the kind that stays on metal
You’ll see in the photo’s that I also cut some non angle iron pieces. Those are made specifically for putting the panels at an angle to better get the sunlight.

IMG_8482
IMG_8483
IMG_8484

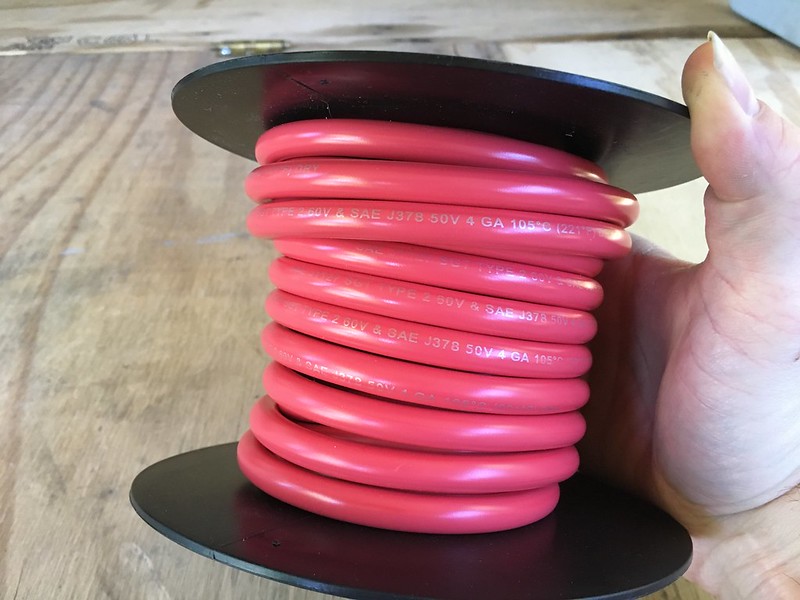
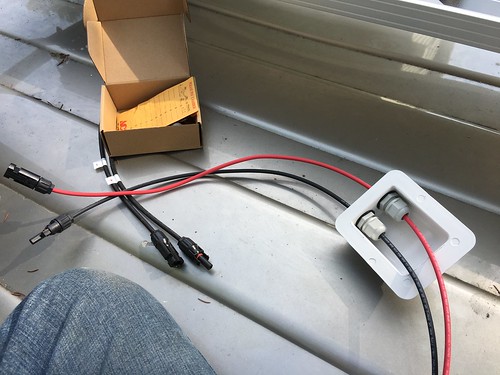
The solar panels are two 100 watt ECO-WORTHY monocrystalline that I got from Amazon. (Link below) Then I got 10 feet of 10 gauge red and black solar extension wire from a place called Windy Nation also off Amazon. The heavy duty ladder carrier is from NC Deals Online and it was a bugger to drill through. It is very heavy duty steel. Links to all of these will be at the end of this entry.

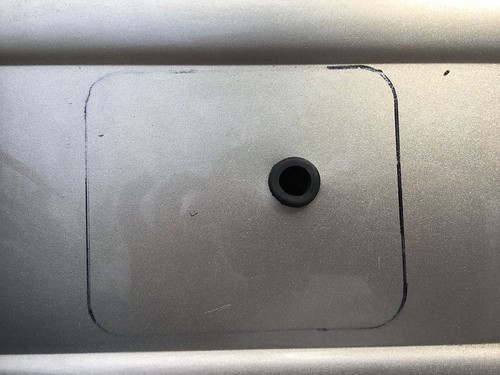
Drilling a hole in the van was tough to do because well there’s now a big hole in the van, but if you do it right you won’t get any water inside. I am not an expert, but I just wanted to do it myself. Once you drill a hole you need to put a rubber grommet in it. You can see it in the photo. It’s just this rubber thing that prevents the wires from getting cut on the sharp edges of the hole you’ve just drilled.

IMG_8570

Now’s the time for this thing called a Weatherproof solar double entry gland. Say that five times quick.

IMG_8569
 IMG_8572
IMG_8573
IMG_8574
 
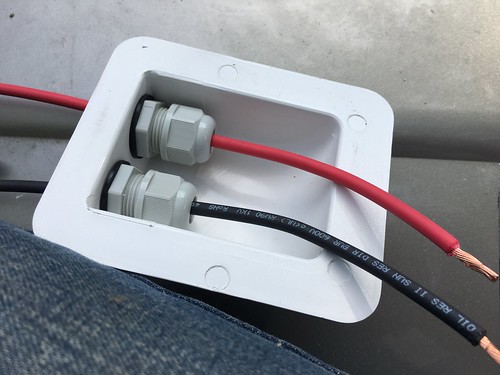
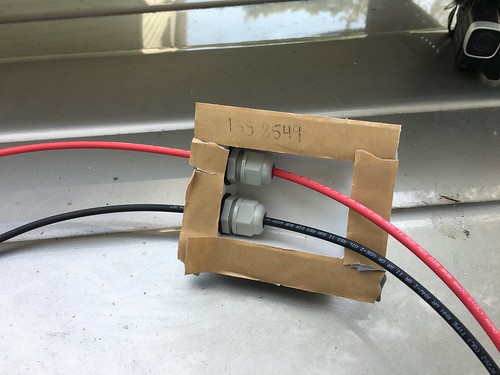
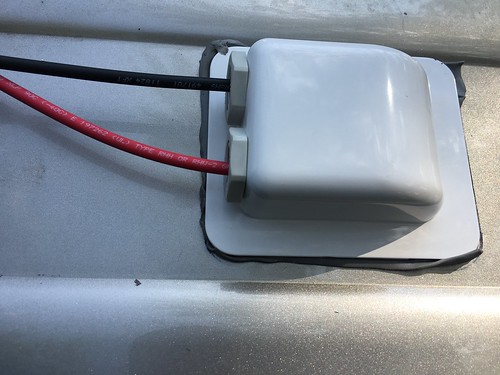
 When you combine that with this putty tape, and some Dicor Self-Leveling Lap Sealant. No water’s going to get in.
You’ll be able to see the whole process in this video, or if you don’t have that kind of data package there’s always the photos. 
 IMG_8577


Here's this weeks video.

 
See ya next week.
Keep the shiny side up.

Trevor & Elissa

Links where you can purchase these things from Amazon.

Dicor http://amzn.to/2yCxoT4 
Ladder Rack  http://amzn.to/2xQXeFA
Solar double entry gland  http://amzn.to/2x8rdVC
10 ft red & black 10 gauge solar extension wire  http://amzn.to/2yCo6GV
Windy Nation 100 watt 12 Volt solar panels  http://amzn.to/2xLjeQl


24 July, 2017

Unboxing & We Hit the Road

Unboxing Solar Panels & Our plans for the next week.

Saturday, our solar panels arrived in the mail. They are two 100 watt panels and they’re beautiful. I am excited to put them into service for us and see the sunlight turn into energy. It feels great to start a journey into this beautiful renewable future.


Elissa and I are also announcing that we are going on our first biggie journey in ‘Woody’ the Van. Now, we aren’t going to be telling you where we are going specifically till after we’re there. Suffice it to say we will be traveling throughout the state of Minnesota and Wisconsin. The van has an appointment with the van Dr. we hope everything goes well and we are given the all clear to go on our probably 1000 mile journey.
               
Keep your ears on good buddies. We’ll be updating the instagram. Look for hashtag "Traveling with the Martys".
           

10 July, 2017

The Bed aka Hubba Hubba

Okay all kidding aside, here is the video of the bed.
We were going to buy an 8-12 inch foam mattress and if/when we go full time we probably will just before we do that. For now though they are to expensive to warrant purchasing for part time folks.

What we got is a queen size mattress and we only got it because they didn't have any full sized ones in our price range. There was one that inflated itself, monitored it's air pressure and kept itself at the right spot for just over a hundred bucks but we didn't want to spend all of that. It also sort of creeped us out. I mean would you want an 'intelligent' mattress?
When I built the van bed I sort of went off of the one in our bedroom, and morphed it to fit the van. The van bed is sort of a mish mash of a full sized futon bed and whatever fit.
We got the twenty dollar queen size then followed with the clearance Star Wars sheets.
I know your jealous. It's okay they are that cool.

We test drove them that night as well. The lights worked in the van, the bed worked in the van. I got super excited and couldn't sleep well. The thing that I'd wanted to make was made and it worked.
    "IT'S ALIVE! IT'S ALIVE!!" so were the mosquito's. I will definitely be make some screens for the windows.
Since we were in our own backyard for the test drive I brought my laptop out and connected to our wifi and we watched some Netflix from the van before bed.
It was a great way to spend a Saturday evening.
Here's that video.


Remember Keep the shiny side up.
Trevor Marty

03 July, 2017

Electrical Test Run

Electrical Test Run.

It’s just like it sounds. Elissa and I go for a test ride of the electricity.
I set it up so that the control panel is in the front of the bed and we have easy access to it. The battery however is going to be mounted in the rear of the vehicle. A wire will bring the current up to the control panel. This is just a test run to see if I wired, soldered, and fused everything properly. It turns out I did. Hip Hip Hurray. This has been quite a steep learning curve. There was one minor-ish issue. I had hoped to have wired an on/off switch to the charging station. The reason for this is because I choose (accidentally I might add) a back-lit kind and the light is always on. There is no way to turn it off, so I thought if I put an on/off switch before the current it would turn the thing on and off. I did it wrong and it was always on.
****Author Shrugs his shoulders****
You'll see what I mean in the video and I’ll keep at it and get it figured out at some point.  
Well, thanks for stopping by, and be sure to keep coming back for updates on the van and other miscellany.

Have a great day gang and keep the shiny side up.
Trevor Marty

PS Next week we unfurl the bed and take it for a test run. Watch out for the mosquito's.

19 June, 2017

Van Build Electrical System

Components that I will be using for my van build electrical system.

     Today we're going to go through the parts which I will be using for the electrical system on my camper van. Now, this isn't a 'how to' blog. Nope, it's only a small outline of what I will be using for my own build.

     We’re going to start with the way I will be charging my battery, because that’s the front of the van and it seems like a terrific place to begin. I have decided to charge my battery bank (all one battery of it) two ways. One is through the alternator and the other is via solar power. Now as of the writing of this blog post I don’t have any solar so we will just be doing the alternator for the time being. The alternator charges the starting battery, the one which starts your vehicle. It is possible to split that charge and allow it (the alternator) to charge a second battery. This is what we will be doing. There are many ways to do this, but I am choosing to use a constant duty solenoid. IMG_8225
It is an electromagnetic switch which is turned on via a ‘keyed fuse thing’. Essentially you connect it to the starting battery and the house battery then connect it to the main fuse box. Making sure that the fuse you’re using only turns on when the key turns the car on. That way the two batteries are not connected when the car is off. They are only connected when the car is on.
The wire you use to connect the two batteries is huge. Mine is 2 gauge wire as you see in the photo.  IMG_8224These are the connectors which will be squished onto the ends of the wire.  
IMG_8227
You’re also going to need a really big fuse for that part. This fuse will go under the hood, but as of the this moment I’m not entirely sure where. I think it goes after the solenoid and before the house battery. .
I’m choose to put a nice giant red on/off switch to the whole system. Here is my switch. It sure is a fancy red color isn’t it? IMG_8232 Now we will put another one of those giant fuses. See previous photo somewhere back there. That leads to a 500 watt inverter. 
IMG_8238
Now many boondockers will be using way way bigger ones, but we are not full time and will not be bringing fridges and things. It’s going to be there as sort of a just in case. I mean the minute you don’t think you need something is the minute you need it, so here it is. .
Here is the little dc fuse box, and fuses I will be using for the LED lights and the charging stations. IMG_8226
Here are the charging stations and a switch for the smaller of the two. IMG_8237 IMG_8236
I’m going to wire the switch in because I noticed when I tried it before that the little blue light stays on all the time. I don’t like that. I want to be able to switch it off when it's not in use. IMG_8228
That’s it really. We have a small system because we don’t have many needs really. We are not full timers. We will be doing this part time till we retire and then we’ll see what happens. For the moment this will do.
Oh and here is the last piece to our electric puzzle although it’s not really electric. It’s just fun. IMG_8239
A CB.
Yup, because well….why not.

Have a great day gang and keep the shiny side up.

30 May, 2017

A Realistic Bed Build

 
     Well, I guess I’m a day late and a dollar short, but here it is anyway...Monday’s blog on Tuesday.
You see I wanted to include the bed build into Mondays blog because it’s finished.
Well sort of.  The ‘sort of’ only means there is always something more you can do to it.
I’m sure if we wanted we could have sanded the boards, stained them, or both. We could have measured better, and probably not scuffed the walls up while we installed the silly things.
However, we didn’t do those things what we did do though was this.
Build the legs and support parts, then measured a few times, scratched our heads, made more coffee, and finally cut the one piece of ¾ inch plywood we had. I have actually had that piece around for probably close to 10 years. It’s held a motorcycle, leaned against the door, been set between two saw horses with a sheet for a table cloth and a bunch of good food on it for my wedding rehearsal dinner, and probably more that I can’t remember. Now it’s going to be a bed for my wife and I as we begin another chapter in our lives and travel the country.
      It took quite a while to settle on the design we did because there are just so many good ones out there. Just when we thought we had decided we’d be astounded by someone elses design. What finally made us decide what we wanted was a realistic look at my own abilities. Don’t get me wrong I’m not downing myself at all, but a construction guy I am not. It’s only recently that I’ve been able to tell the difference between my thumb and the head of a nail. 
     I think to set oneself up for success you have to have a realistic view of your starting point or you’re just going to get disappointed. Doing this project has helped me to actually get some ‘street cred’ and walk into Menards or Home Depot head held high shouting to the world “I know what a hammer is.” as I strut down the long aisles.    
     The hinges in the middle of the bed were given to me by an 95 year old WWII veteran who lives two houses down from us. His gutters needed cleaning and he couldn’t get up that high on the ladder, so I did that and he gave me four hinges and an on/off switch which will also be used in this build.  I’ve tried to include photo’s in the blog because I know not everyone has the data plan to watch the video, however there is also a video.

Thanks for tuning in and having a look here.
Next week we’re going to have a look at the components I’m going to use on the electrical install.
Until then see ya
    Trevor Marty
PS The video is under the photo's.
This is how the legs look.

Under the bed.
I just used what screws I had around.


It's true. You are cool. Thanks for reading this.

My baldness laying in the bed.

Two different colored socks and a bird feeder.


Great Storage!

13 March, 2017

Van to RV Plans

     With Summer not to far off it’s a good time to start planning where and what you’re going to be doing. My wife and I will probably be camping a lot this year which brings up my van to rv conversion project. I live in Minnesota and the van is much to large to get into my garage so any work that I’ve been doing has been outside and in the snow. Yes, you’re right that does mean that it’s been going slower than usual even for me. If we go back in time to my other entries you’ll notice over and over one common denominator. I have very little experience with construction. Which means that this whole project is a big challenge for me and something I am very excited to learn about.
Today, let’s talk about the counter top, flooring, and the water situation.

Countertop, sink, and the junk that holds it all in place.
    
    We’ve decided on the counter top and the type of wood it’s going to be. We’ve also decided on the height, length, and depth of it as well. The counter top is going to be Aspen with a butcher block oil all over it to protect it. The height will be between 33 and 43 inches, the length around 5 feet, and the width/depth (I get those confused all the time) about 18 inches.
Counter top
 Aspen, as you can see in the picture is a light wood and sort of reminds me of Pine a little bit. The height was completely dictated by the window it’s going to be sitting in front of, the length will be five feet because that’s all the space we've got on that side of the van.
    “What’s going to hold it up”, you ask? Well, that’s the part I’m excited about. If all goes well it’s going to be a light skeleton frame tall enough to fit two or three of these plastic drawers under and strong enough to hold the counter in place. 
Storage under the sink.
      As far as an outside covering I think we’re going to use anything we can find for the sides but leave the front open. When I say open what I mean is we’re going to have some kind of draw string curtain covering. Now this is just an idea and it can change. The reason we’re leaving the front open is weight. We’re trying to keep the weight down. Weight and gas mileage don’t play well together and as it is we get between 12 - 18 miles per gallon. Imagine with all this wood.

Under the sink
The Sink
The cute drain plug
     The sink is made out of a big red plastic rectangle thing we found at Goodwill. I’ve drilled a hole large enough to put a drain in and after I get the counter top oiled up I’ll cut a space in it. Of course it’s one thing to say something like this and quite another to actually do it. When that happens I’ll be sure to get photo’s and we’ll have fun watching it.

Water

    We’re still deciding on the containers, but have decided on where and how it’s going to work. There will be two containers located right underneath the sink. One will be fresh water and the other will be gray water. That’s it. Chances are they’ll both be bungee corded in place.

Flooring

     We were looking for the perfect flooring for our little camper van thingy. That's a technical term by the way. 'Thingy'. We checked out Menards, Lowes, and any other place that we thought might sell that sort of thing. Eventually we found an open box item. It was way cheaper and although it’s not our favorite color we’re good with it. You can see it’s darker, but that’s okay with us. We did get this at Lowes, and we figure one box will cover the floor in our little van. 
      As you can see the plan is finally at a place where we can really start putting it all together. Now all we do is hope for some sunny days. When that happens I’ll be sure to take more photos.

Keep it tuned here for more updates.
Thanks for taking the time to read and hang out here. You're awesome!!


-Trevor Marty